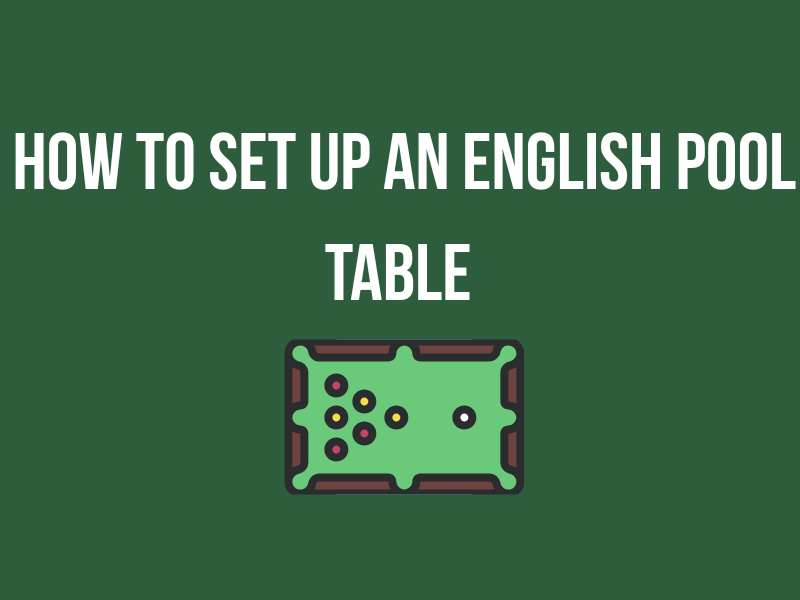
How to Set Up a Pool Table
Proper table setup forms the foundation of fair and enjoyable English pool games. If you’ve been wondering how to set up a pool table, this guide is for you. Whether you’re breaking in your first home table, organizing club matches, or simply want to ensure consistent play, understanding correct setup procedures eliminates disputes and creates optimal playing conditions for all participants.
We’ll cover everything from basic ball arrangement to table spacing requirements, ensuring you can confidently set up any English pool game according to official standards. With English pool’s growing popularity across the UK and internationally, mastering these fundamentals helps maintain the sport’s integrity while enhancing your playing experience.
English Pool Table & Equipment Overview
Understanding your equipment specifications ensures proper pool table setup and consistent gameplay across different venues and tables.
Standard Table Dimensions
Most Common Sizes:
- 7ft tables: 7′ × 3.5′ playing surface (most popular in pubs and clubs)
- 6ft tables: 6′ × 3′ playing surface (compact spaces and home use)
- Playing surface ratio: Always maintained at 2:1 length to width
Key Table Features
The Baulk Line:
- Located one-fifth of the table length from the head cushion
- Creates the “baulk area” where the cue ball is placed for break shots
- Typically marked by cloth color change or subtle line marking
The D Area:
- Semi-circular area at the head of the table
- Radius equals the distance from baulk line to head cushion
- Where the cue ball must be placed for break shots and after certain fouls
Spot Positions:
- Black spot: Located at the foot of the table, typically 6.5″ from foot cushion
- Breaking spot: Where the apex ball is positioned for racking
- Spots should be clearly marked but not raised above cloth level
Ball Set Specifications
Standard English Pool Ball Set:
- 15 object balls: Typically 7 red, 7 yellow, 1 black (8-ball)
- 1 white cue ball: Slightly different size/weight in some sets
- Ball diameter: Usually 2″ (50.8mm) for English pool
- Alternative color schemes: Some venues use spotted/striped balls
Ball Identification:
- Red group: Equivalent to “solids” in American pool
- Yellow group: Equivalent to “stripes” in American pool
- Black ball: The “8-ball” – must be potted last to win
Ball Layout: How to Set Up the Balls on an English Pool Table
Racking the Balls – Step by Step
Proper ball arrangement ensures fair breaks and consistent gameplay across all matches.
Equipment Needed
- Triangular rack: Standard 15-ball triangle (same as American pool)
- Complete ball set: 7 reds, 7 yellows, 1 black, 1 white cue ball
- Clean table surface: Free from chalk dust and debris
Step-by-Step Racking Process
Step 1: Position the Triangle
- Place triangle so apex ball sits on the designated spot (usually foot spot)
- Ensure triangle base runs parallel to the foot cushion
- Triangle should be centered on the table’s width
Step 2: Place the Black Ball
- Black ball goes in the center of the triangle (position 5 from apex)
- This is the most critical placement – never varies regardless of rule set
- Ensure black ball sits firmly in triangle center
Step 3: Position Corner Balls
- Back corners: Place one red ball and one yellow ball
- Which corner for which color: Doesn’t matter – either corner can have either color
- Ensures both groups have equal opportunity from break
Step 4: Fill Remaining Positions
- All other balls (5 reds, 5 yellows remaining) go in random positions
- No specific pattern required for remaining balls
- Mix colors randomly throughout the triangle
Step 5: Tighten the Rack
- Push all balls firmly together within triangle
- Ensure no gaps between balls
- Remove triangle carefully to maintain ball contact
Visual Ball Arrangement
Position Layout (viewed from foot of table):
1 (any color)
2 3
4 5 6
7 8 9 10 11
12 13 14 15 16
Key positions:
– Position 1: Apex ball (any color)
– Position 5: BLACK BALL (always)
– Positions 11 & 12: One red, one yellow (either corner)
– All others: Random color placement
Critical Requirements:
- Apex ball touches the designated spot
- Black ball in center position (5)
- One red and one yellow in back corners
- All remaining balls randomly distributed
- Tight formation with no gaps
Cue Ball Placement for the Break
Cue ball placement for the break matters more than you think. There’s a few things to keep in mind. The break in general is an element of your game that you’ll have to practice over and over again with slight variations. That’s the only way you can improve it: reps.
Breaking Rules:
- Cue ball position: Must be placed anywhere within the D area
- Player choice: Breaking player chooses exact position within D
- Contact requirement: Must strike the racked balls first
Strategic Considerations:
- Center of D: Most common position for straight break
- Side positions: Allow for angled breaks and spin application
- Edge of D: Maximum distance for power breaks
Legal Break Requirements: Once the cue ball is struck, the break is legal if:
- At least one object ball is potted, OR
- At least two object balls plus the cue ball contact cushions
- Failure to meet these requirements results in foul and re-rack option
Table Markings & Spacing
A big part of how to set up a pool table is in having enough space around you. A lot of people try to fit tables in rooms that really don’t facilitate it, and then end up taking hours to set the thing up because they’ve not got any space around them to work.
Make sure to take proper measurements of any room you plan to have a pool table in, and double/triple check that you’ve definitely got enough space.
Essential Table Measurements
Understanding proper table dimensions ensures regulation play and adequate space for comfortable cueing.
Standard 7ft English Pool Table Dimensions
Playing Surface:
- Length: 84 inches (7 feet)
- Width: 42 inches (3.5 feet)
- Baulk line: 16.8 inches from head cushion
- D radius: 11.5 inches
- Black spot: 6.5 inches from foot cushion
Pocket Specifications:
- Corner pockets: Typically 3.5″ – 3.75″ wide
- Side pockets: Slightly wider, approximately 4″ – 4.25″
- Pocket depth: Sufficient to hold potted balls securely
Room Size Requirements
Minimum Space for Comfortable Play:
| Cue Length | 7ft Table | 6ft Table |
| 57″ Cue | 17′ × 13’6″ | 16′ × 12’6″ |
| 54″ Cue | 16′ × 12’6″ | 15′ × 11’6″ |
| 48″ Cue | 15′ × 11’6″ | 14′ × 10’6″ |
Space Calculation Method:
- Table length + (2 × cue length) + 6″ clearance = minimum room length
- Table width + (2 × cue length) + 6″ clearance = minimum room width
Practical Considerations:
- Spectator space: Add extra room if viewers will be present
- Furniture clearance: Account for chairs, cabinets, and other obstacles
- Lighting requirements: Ensure adequate overhead clearance for proper lighting
- Ventilation: Allow space for air circulation around playing area
Critical Spot Positions and Measurements
Accuracy Requirements:
- Spots should be marked clearly but not raised above cloth surface
- Use removable markers during setup if permanent spots aren’t visible
- Verify measurements periodically as table settling can affect positioning
Tools for Verification:
- Use a measuring tape for spot placement verification
- Triangle should fit snugly when apex ball is on correct spot
- D area can be checked with string compass method
Common Set Up Mistakes (And How to Avoid Them)
Understanding typical errors helps ensure consistent, fair gameplay while avoiding disputes and re-racks.
Top Setup Errors
1. Misaligned Triangle Position
- Error: Triangle not parallel to foot cushion or off-center
- Fix: Use table markings as reference; ensure apex ball sits precisely on spot
- Impact: Creates unfair break opportunities and inconsistent ball scatter
2. Incorrect Black Ball Placement
- Error: Black ball in wrong triangle position (not center)
- Fix: Count positions carefully – black always in position 5
- Impact: Violates official rules and affects strategic break planning
3. Poor Corner Ball Distribution
- Error: Both corner balls same color, or specific colors in specific corners
- Fix: Ensure one red and one yellow in back corners, either corner acceptable
- Impact: Gives unfair advantage to one group during break
4. Loose Rack Formation
- Error: Gaps between balls when triangle is removed
- Fix: Push balls firmly together; use gentle pressure to maintain contact
- Impact: Reduces break effectiveness and ball distribution
5. Wrong Cue Ball Position
- Error: Placing cue ball outside D area or on incorrect spot
- Fix: Verify D boundaries; cue ball can be anywhere within D for break
- Impact: Rules violation potentially requiring re-break
Achieving Consistently Tight Racks
Professional Techniques:
- Rolling method: Roll balls gently into position rather than dropping
- Pressure points: Apply even pressure from multiple sides of triangle
- Triangle removal: Lift straight up to avoid disturbing ball positions
- Final check: Verify no visible gaps between adjacent balls
Common Tightening Mistakes:
- Applying too much pressure (can damage balls or cloth)
- Uneven pressure causing balls to shift when triangle is removed
- Removing triangle at angle rather than straight vertical lift
Regional & Local Rules Variations
While core setup principles remain consistent, understanding regional variations helps adapt to different playing environments and rule sets.
Major Rule Set Differences
World Eightball Pool Federation (WEPF) Rules:
- Standard racking: Black in center, mixed corner colors as described above
- Break requirements: Must pot ball OR drive two balls plus cue ball to cushions
- Cue ball placement: Anywhere in D area
Blackball Rules:
- Identical racking procedure to World Rules for basic setup
- Break requirements: Similar to WEPF with minor penalty variations
- Regional adaptations: Some venues modify break requirements
Traditional UK Pub Rules:
- Racking typically the same as international standards
- Local variations: May include house rules about re-rack situations
- Equipment differences: Some venues use different ball sets or table markings
League and Tournament Considerations
Verification Requirements:
- Always confirm local racking rules before competitive play
- Some leagues require specific officials to rack balls
- Tournament play may have additional equipment specifications
Documentation:
- Keep rulebooks accessible for dispute resolution
- Photograph setups when questions arise about proper procedure
- Record local variations for consistency in regular venues
Equipment Standards:
- Verify ball sets meet local requirements (size, weight, markings)
- Ensure triangles are appropriate size and condition
- Check table spot markings are clearly visible and accurate
English Pool Table Set Up FAQs
How many balls are used in English pool?
English pool uses 16 balls total: 15 object balls plus 1 white cue ball. The 15 object balls consist of 7 red balls, 7 yellow balls, and 1 black ball. This is the same total number as American pool but with different color schemes and slightly different ball sizes (2″ diameter vs. 2.25″ for American pool).
Which ball goes on the spot in English pool?
The apex ball (front ball of the triangle) goes on the spot – this can be any colored ball except the black ball. The black ball always goes in the center position of the triangle (position 5 when counting from the apex). The spot used is typically called the “foot spot” or “racking spot” and is usually positioned 6.5 inches from the foot cushion.
Can I use an American pool triangle for English pool?
Yes, American pool triangles work perfectly for English pool since both games use 15 object balls arranged in the same triangular formation. The triangle size is identical – the only differences between the games are ball sizes, table dimensions, and rules rather than the racking equipment itself.
What if my table has no visible spots?
If spots aren’t clearly marked, you can:
- Measure manually: Use a tape measure to find the correct position (typically 6.5″ from foot cushion)
- Use temporary markers: Place removable spots or chalk marks during setup
- Geometric method: The racking spot should be where a properly-sized triangle places the apex ball when the base is parallel to the foot cushion
- Professional marking: Have spots professionally re-marked if you own the table
What’s the correct way to re-rack after a foul break?
After a foul break, the incoming player has two options:
- Accept the table as it lies and continue play with ball-in-hand in the D
- Request a re-rack with the same player breaking again
If choosing to re-rack, follow the exact same setup procedure: black ball in center, one red and one yellow in back corners, all others random, with the triangle apex on the spot and cue ball anywhere in the D.
Do all English pool tables have the same spot positions?
While proportions remain consistent, actual measurements vary between 6ft and 7ft tables. The black spot is always positioned at a distance equal to one-sixth of the table length from the foot cushion. On a 7ft table, this equals approximately 6.5 inches, while on a 6ft table it would be approximately 5.5 inches. The key is maintaining proper proportional relationships rather than exact measurements.
Mastering Pool Table Setup
Mastering English pool table setup creates the foundation for fair, enjoyable games while demonstrating respect for the sport’s traditions and standards. Proper ball arrangement, accurate positioning, and consistent technique ensure every game begins on equal footing for all players.
Key setup principles to remember:
- Black ball always in triangle center – this never changes regardless of rule variations
- One red and one yellow in back corners – ensures fair group distribution
- Apex ball precisely on the spot – critical for legal break requirements
- Tight rack formation – eliminates gaps for optimal break effectiveness
- Cue ball anywhere in D – breaking player’s choice within designated area
Setup consistency benefits:
- Reduces disputes and rule questions during play
- Creates fair playing conditions for competitive matches
- Builds confidence in hosting games and tournaments
- Demonstrates knowledge and respect for proper procedures
Developing Setup Skills
Practice recommendations:
- Time yourself racking balls to build speed and efficiency
- Practice with different ball sets to adapt to various equipment
- Study local rules to understand any venue-specific variations
- Observe experienced players and officials during setup procedures
Equipment maintenance:
- Keep triangles in good condition for consistent tight racks
- Ensure balls are clean and properly maintained
- Verify table spots are clearly marked and accurately positioned
- Maintain proper table conditions (level, clean cloth, clear markings)
Continuing Your English Pool Education
Understanding pool table setup procedures represents just one aspect of comprehensive English pool knowledge. Build upon this foundation by exploring our detailed guides on English pool rules, which covers gameplay from break to finish, and English vs. American Pool: Key Differences to understand equipment and rule variations.
For equipment guidance, our Best Pool Cues UK: A Beginner’s Guide helps select appropriate tools for your playing level and style preferences.
Remember that consistent, accurate setup becomes second nature with practice. Focus on developing proper habits early, and you’ll contribute to better games for everyone while building your reputation as a knowledgeable, respectful player.
Setup procedures and measurements may vary slightly between manufacturers and venues. Always verify current local standards and equipment specifications when setting up for competitive play.