How to Set Up a Snooker Table
Proper snooker table setup is the foundation of every quality game, yet it’s one of the most overlooked aspects for players transitioning from other cue sports. Unlike pool, where ball placement is relatively straightforward, snooker requires precise positioning of 22 balls across specific table spots that directly impact gameplay strategy and fairness.
Whether you’re a beginner learning the game, a new table owner setting up at home, or someone establishing a snooker area at a club, understanding correct ball layout and table preparation ensures every frame starts with authentic snooker conditions. Improper setup can lead to unfair advantages, altered break strategies, and gameplay that doesn’t reflect true snooker standards.
Snooker Table Setup Basics
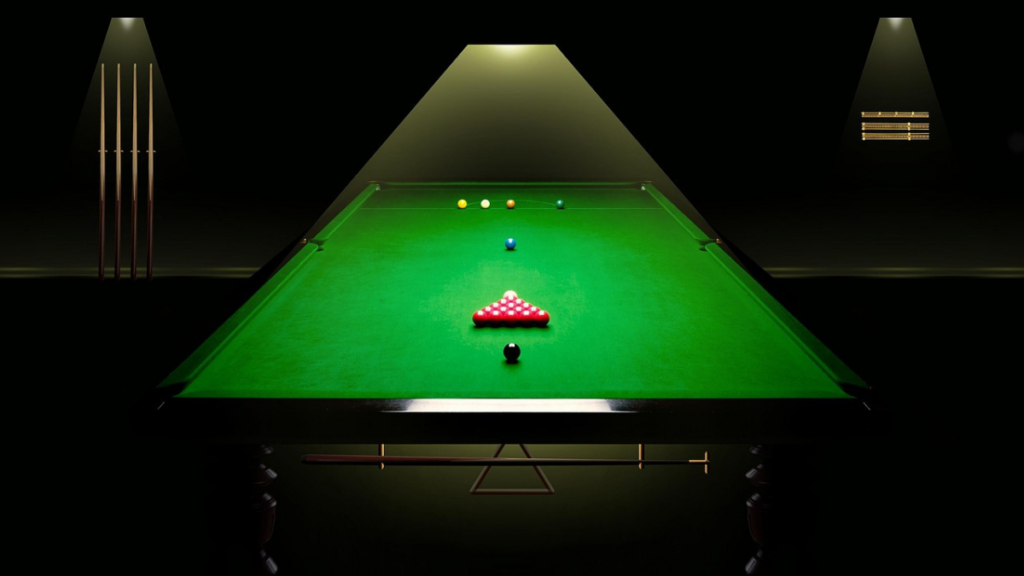
Table Dimensions and Layout Overview
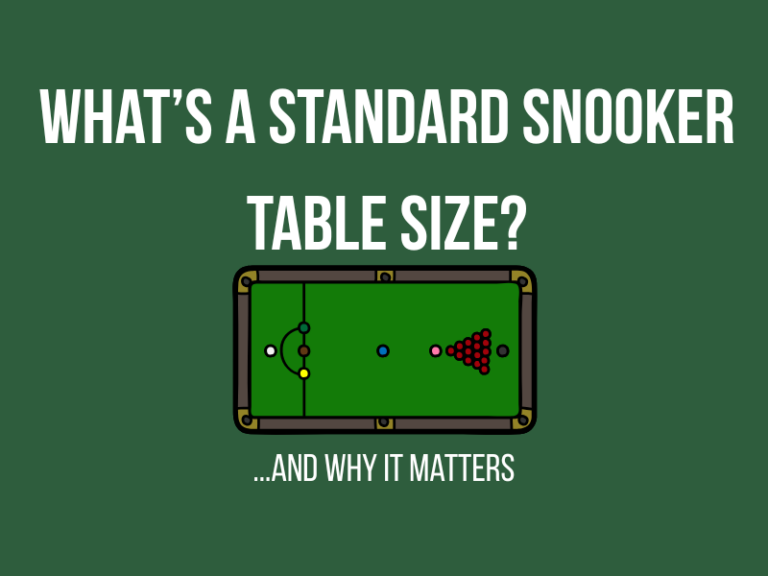
The standard snooker table size measures 12 ft × 6 ft (3.658m × 1.829m) with specific markings and spots that determine ball placement. Just like with professional snooker players, you should aim to always play on the same sized table. This makes sure that you’re practicing for the exact conditions of what would be expected if you were ever to play in a tournament.
The table’s design incorporates precise measurements that have remained consistent since the sport’s formalization in the early 20th century.
Essential Preparation Requirements:
- Clean, level playing surface with proper felt condition
- Clearly visible table markings and spots
- Adequate room clearance (minimum 5 ft around all sides for cue movement)
- Proper table lighting (ideally 500-750 lux over the playing surface)
Table Markings and Areas
Understanding snooker table markings is crucial for accurate ball placement and gameplay comprehension.
Primary Table Areas:
The Baulk Area:
- Baulk line: Positioned 29 inches (737mm) from the bottom cushion
- The D: Semi-circular area with 11.5-inch (292mm) radius centered on the baulk line
- Baulk spots: Three colored ball positions along the baulk line
Center and Top Areas:
- Center spot (Blue): Exact center of the table
- Pink spot: 12.75 inches (324mm) from the top cushion
- Black spot: 12.75 inches (324mm) from the bottom cushion
Detailed Spot Positions:
| Color | Position | Distance from Cushion |
| Yellow | Left baulk spot | 29″ from bottom, left of center |
| Green | Right baulk spot | 29″ from bottom, right of center |
| Brown | Center baulk spot | 29″ from bottom, center |
| Blue | Center spot | Table center point |
| Pink | Pink spot | 12.75″ from top cushion |
| Black | Black spot | 12.75″ from bottom cushion |
Room Space Requirements for Home Setup
Minimum Clearances for 12ft Table:
- All sides: 5 ft (1.52m) minimum for standard cue length
- Preferred clearance: 6-7 ft (1.83-2.13m) for comfortable play
- Ceiling height: Minimum 8 ft (2.44m) for overhead shots
- Total room size needed: Approximately 22 ft × 16 ft (6.7m × 4.9m)
Lighting Considerations:
- Even illumination across entire playing surface
- Avoid shadows from overhead fixtures
- Professional standard: 500-750 lux measured at table level
Standard Snooker Ball Set and Required Equipment
Complete Ball Configuration
A regulation snooker set contains 22 balls total:
- 15 red balls (1 point each)
- 6 colored balls with specific point values:
- Yellow (2 points)
- Green (3 points)
- Brown (4 points)
- Blue (5 points)
- Pink (6 points)
- Black (7 points)
- 1 white cue ball
Essential Setup Equipment
Required Tools:
- Snooker triangle/rack: Wooden or plastic frame for arranging red balls
- Ball cleaner: Cloth or specialized cleaning equipment
- Spot markers: For tables with worn markings
- Measuring tape: To verify spot distances when markings are unclear
Helpful Accessories:
- Rest and extended rest: For reaching distant shots during play
- Chalk: For cue tip preparation
- Table brush: For felt maintenance between games
Combine the above list with the best snooker cue you can buy, and you’ll be off to a great start at practicing in a long-term, sustainable way.
Step-by-Step Guide to Setting Up Snooker Balls
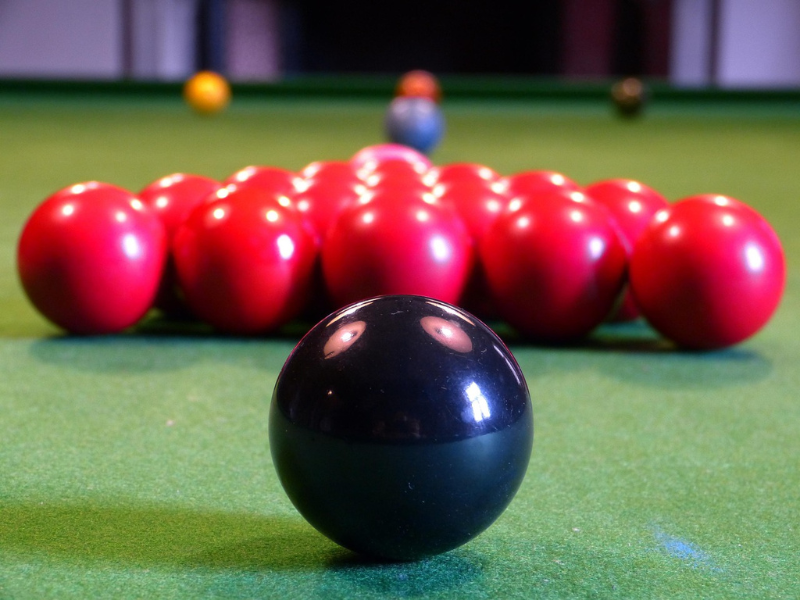
Step 1: Placing the Reds
The red ball triangle is the foundation of every snooker frame and requires precise positioning for fair play.
Triangle Formation:
- Gather all 15 red balls into the triangular rack
- Pack tightly with no gaps between balls
- Position triangle base parallel to the top cushion
- Align triangle apex directly over the pink spot
- Ensure first red ball touches the pink ball when pink is properly positioned
Critical Positioning Points:
- Triangle base must be perfectly parallel to top rail
- No gaps between red balls within triangle
- Apex red should just touch the pink ball
- All reds should be stable and not rolling
Common Triangle Errors to Avoid:
- Loose packing that allows balls to separate during break
- Misalignment with table geometry
- Triangle extending beyond or falling short of pink spot
- Uneven base positioning relative to top cushion
Step 2: Positioning the Colored Balls
Each colored ball has a designated spot position that must be precise for regulation play.
Bottom Rail Colors (Baulk Area):
Brown Ball (Center Baulk):
- Position exactly on baulk line center
- 29 inches (737mm) from bottom cushion
- Equal distance from both side cushions
Green Ball (Left Baulk):
- Left side of baulk line when facing from bottom of table
- Standard distance: 11.5 inches left of center line
- On same 29-inch line as brown ball
Yellow Ball (Right Baulk):
- Right side of baulk line when facing from bottom of table
- Standard distance: 11.5 inches right of center line
- Mirror position to green ball
Center and Top Colors:
Blue Ball:
- Exact center of table (center spot)
- Equal distance from all four cushions
- Critical for proper table balance
Pink Ball:
- Pink spot: 12.75 inches (324mm) from top cushion
- Centered between side cushions
- Must touch apex of red triangle
Black Ball:
- Black spot: 12.75 inches (324mm) from bottom cushion
- Centered between side cushions
- Furthest ball from baulk area
Verification Checklist:
- All balls positioned on correct spots
- Colors match their designated point values
- Pink ball touching red triangle apex
- All balls stable and properly centered
- Clear path between ball positions
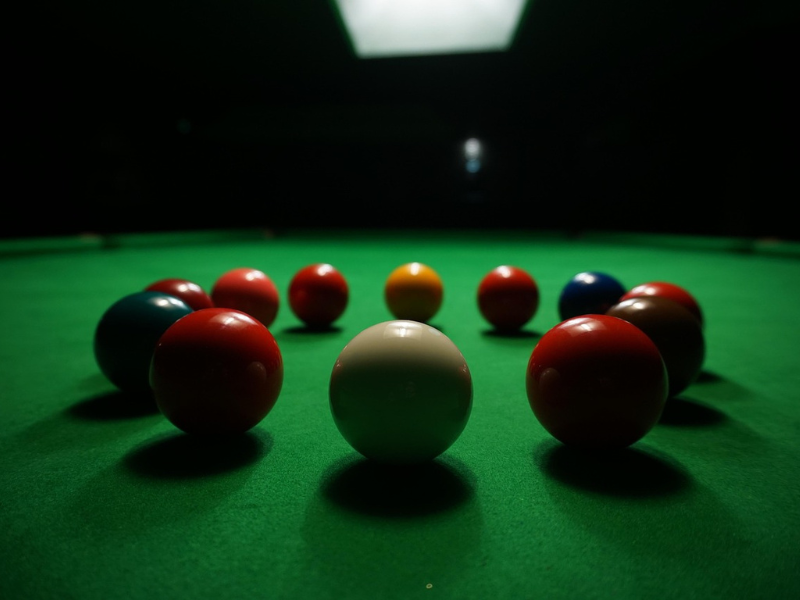
Step 3: Placing the Cue Ball
Initial Break Position:
- Place cue ball anywhere within the D (semi-circular baulk area)
- Most players position slightly off-center for optimal break angle
- Ball must be fully within D boundary lines
Break-off Strategy Positions:
- Center: Straight-on approach to red pack
- Left/Right offset: Angled approach for side-pocket strategies
- Close to baulk line: Maximum distance from reds for safety
Restart Scenarios:
- After fouls: Opponent places cue ball anywhere in D
- Free ball situations: Cue ball placement in D with nominated ball
- Following safety shots: Next player shoots from cue ball’s resting position
See our full guide on how to break in snooker if this is an area of your game you’re looking to improve.
Common Mistakes in Snooker Setup
Frequent Setup Errors and Solutions
Red Triangle Issues:
- Problem: Loose triangle with gaps between balls
- Solution: Firmly pack balls together, ensuring no movement within rack
- Check: Triangle should maintain shape when rack is gently lifted
Colored Ball Misplacement:
- Problem: Colors positioned approximately rather than precisely
- Solution: Use measuring tape to verify exact distances from cushions
- Check: Each ball should be centered on its designated spot
Table Condition Oversights:
- Problem: Playing on dirty or damaged felt
- Solution: Clean table surface and check for level playing field
- Check: Roll balls across table to identify irregularities
Spacing and Clearance Issues:
- Problem: Insufficient room around table for proper cueing
- Solution: Reorganize room layout or consider smaller table size
- Check: Can comfortably execute shots from all table positions
Quick Setup Verification Process
30-Second Setup Check:
- Red triangle: Tight, parallel, apex touching pink
- Colored balls: All on correct spots, stable positioning
- Table surface: Clean, level, no obstructions
- Cue ball: Properly positioned in D for break
- Equipment ready: Chalk, rest, and accessories accessible
Regional and Table Size Variations
Standard Tournament Setup
All professional snooker tournaments worldwide follow identical WPBSA specifications regardless of location. This standardization ensures consistent playing conditions from local clubs to World Championship venues.
Smaller Table Adaptations
10ft Tables:
- Spot distances proportionally reduced
- Ball positions maintain same relative spacing
- May require smaller ball sets for proper game proportions
8ft and Junior Tables:
- Significance spacing adjustments needed
- Often use 2-inch or 1⅞-inch balls instead of standard 2.07-inch
- Baulk area and spot distances scaled appropriately
Setup Scaling Guidelines:
- Maintain proportional relationships between all measurements
- Ensure pocket-to-ball ratios remain consistent
- Verify triangle fits properly with pink ball position
Club and Home Variations
While official specifications are preferred, practical adaptations may be necessary:
- Worn table markings: Use temporary spot markers for accuracy
- Space limitations: Consider extended rests for wall-adjacent tables
- Lighting constraints: Supplement overhead lighting as needed
Snooker Table Setup FAQs
How do you arrange balls at the start of snooker?
Place 15 red balls in a tight triangle with apex on the pink spot, position 6 colored balls on their designated spots (yellow, green, and brown on the baulk line; blue at center; pink 12.75″ from top; black 12.75″ from bottom), and place the white cue ball anywhere within the D for the opening break shot.
Can you use a pool triangle for snooker?
A pool triangle can work for snooker reds since both use 15-ball triangular arrangements. However, snooker triangles are specifically designed for smaller snooker balls (52.5mm vs 57.15mm for pool), so a pool triangle may be slightly loose. For best results, use a proper snooker triangle or ensure tight packing when using pool equipment. There are lots of differences between pool and snooker, so it’s best to keep the equipment separate for each game.
How far are the spots from the cushions?
Precise spot distances from cushions:
- Baulk line spots (yellow, green, brown): 29 inches from bottom cushion
- Pink spot: 12.75 inches from top cushion
- Black spot: 12.75 inches from bottom cushion
- Blue spot: Center of table (equal distance from all cushions)
What should you do if you can’t see the table markings?
Temporary solutions for worn markings:
- Use removable spot markers or small adhesive dots
- Measure distances with tape measure from cushions
- Mark positions lightly with chalk (remove after play)
- Consider professional table recovering if markings are permanently worn
Why is proper ball setup important?
Correct setup ensures fair play by giving both players identical starting conditions, maintains strategic integrity since snooker tactics depend on precise ball positions, preserves authentic gameplay matching professional standards, and prevents disputes over improper positioning affecting shot difficulty or availability.
Mastering Snooker Table Setup
Mastering proper snooker table setup transforms your playing experience from casual potting to authentic strategic gameplay. Every professional match begins with the exact positioning described in this guide, and maintaining these standards ensures your home games reflect true snooker conditions and challenges.
Key Takeaways for Consistent Setup:
- Measure precisely when table markings are unclear
- Pack red triangle tightly with apex touching pink ball
- Verify colored ball positions using exact cushion distances
- Check table condition before each session
- Practice setup routine until it becomes second nature
The time invested in proper table preparation pays dividends in gameplay quality and skill development. As you become more familiar with setup procedures, consider creating a quick reference card with measurements and positioning guides for consistency across sessions.
For continued improvement in your snooker journey, explore our comprehensive guides snooker rules and snooker ball sets to deepen your understanding of equipment and gameplay fundamentals.
Practice Recommendation: Set up your table completely at least five times, timing yourself to build efficiency while maintaining accuracy. Accurate setup becomes almost automatic with repetition, allowing you to focus entirely on the strategic and technical aspects that make snooker such a rewarding game.